


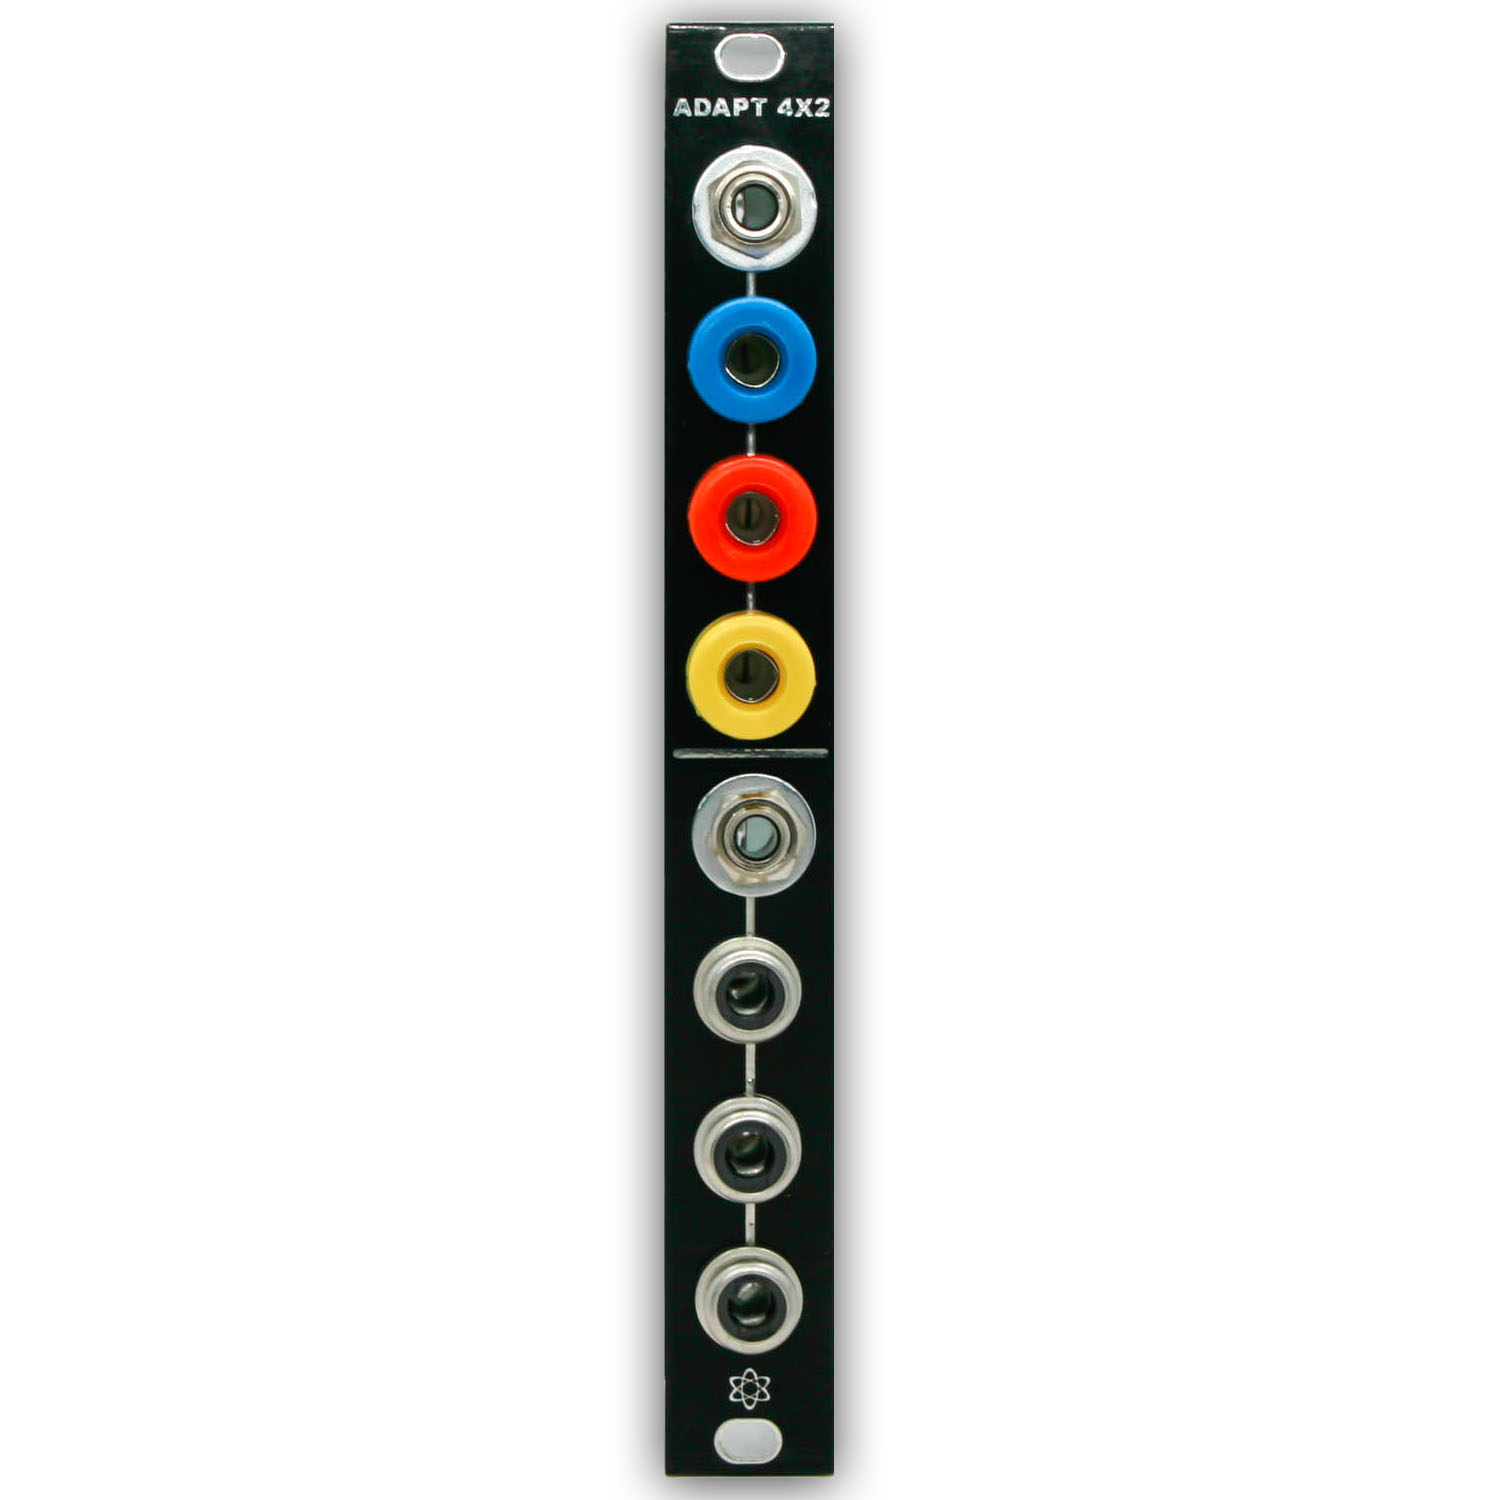
Thank you for purchasing the Synthrotek 3U ADAPT series! The ADAPT series of modules use an original Synthrotek footprint designed to take 3.5mm mono, RCA and banana jacks for maximum configurations! The following modules can use this assembly guide:
4×2
ADJ
P.OUT 1U Tile
SKIP
This is a fairly easy build, but it is very important to get all the components properly soldered into the PCB in the correct placement. If you feel like you can handle it, please proceed! If not, get some help from a friend with experience or purchase a fully completed unit.
Bill of Materials
Bills of Materials with Mouser part numbers:
INSTALLING THE 3.5mm Jack
Take the 3.5mm mono jack as shown below. It is best to wait to have all the jacks installed into the PCB BEFORE SOLDERING.
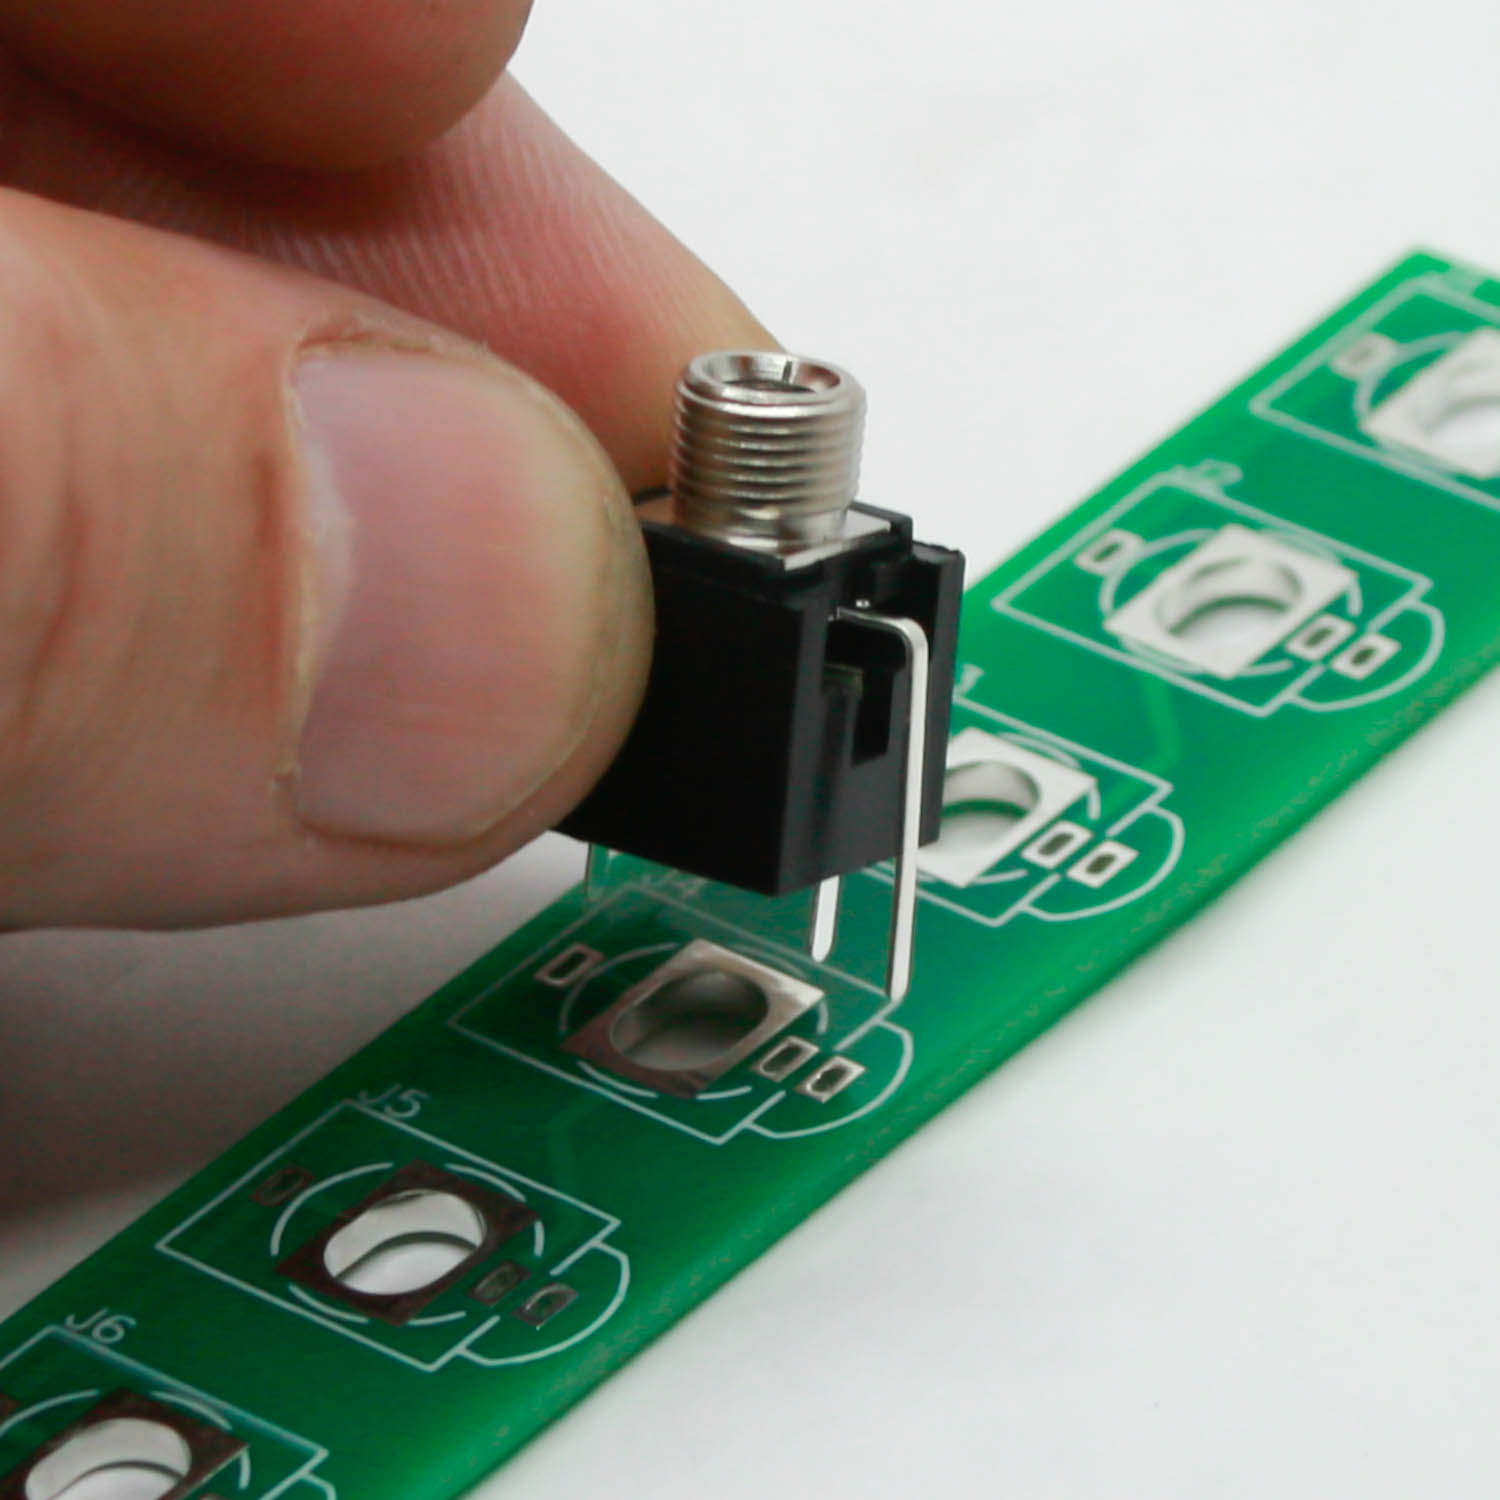
ADAPT 3.5mm Jack
INSTALLING THE BANANA JACK
Take the banana jack and place it through the PCB and tighten down the jack before inserting into the PCB. Banana jacks do not have a ground connection. There are ways to connect a ground from your banana style module system. It is best to wait to have all the jacks installed into the PCB BEFORE SOLDERING.

ADAPT Banana Jack
Place the jack lead through the PCB. It is best to wait to have all the jacks installed into the PCB BEFORE SOLDERING.
INSTALLING THE RCA JACK
Take the components off the jack as shown below. You will need all of these parts.
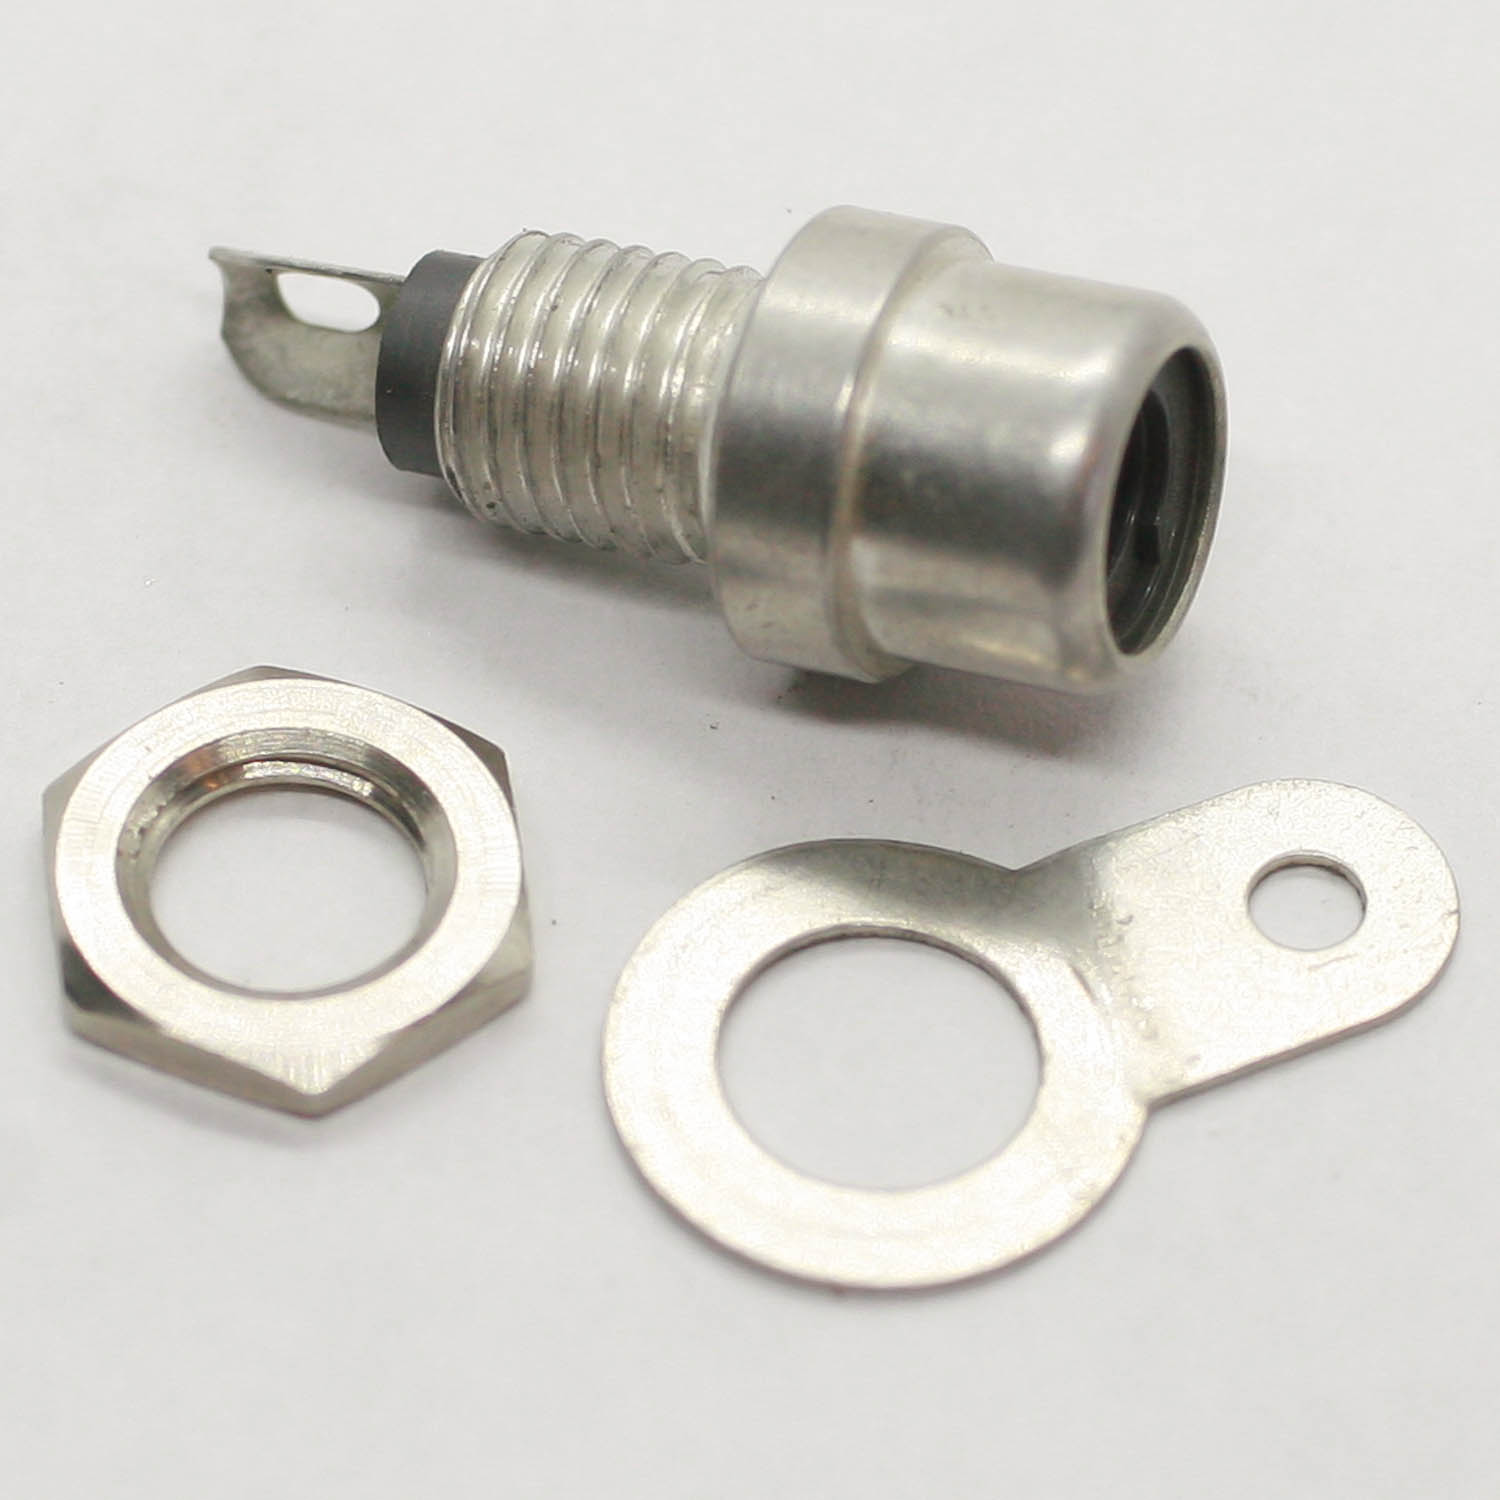
RCA JACK
Place RCA jack through the panel and reassemble it with the nut and the ground connection behind the panel and sticking off the edge as shown below. It is best to wait to have all the jacks installed into the PCB BEFORE SOLDERING.
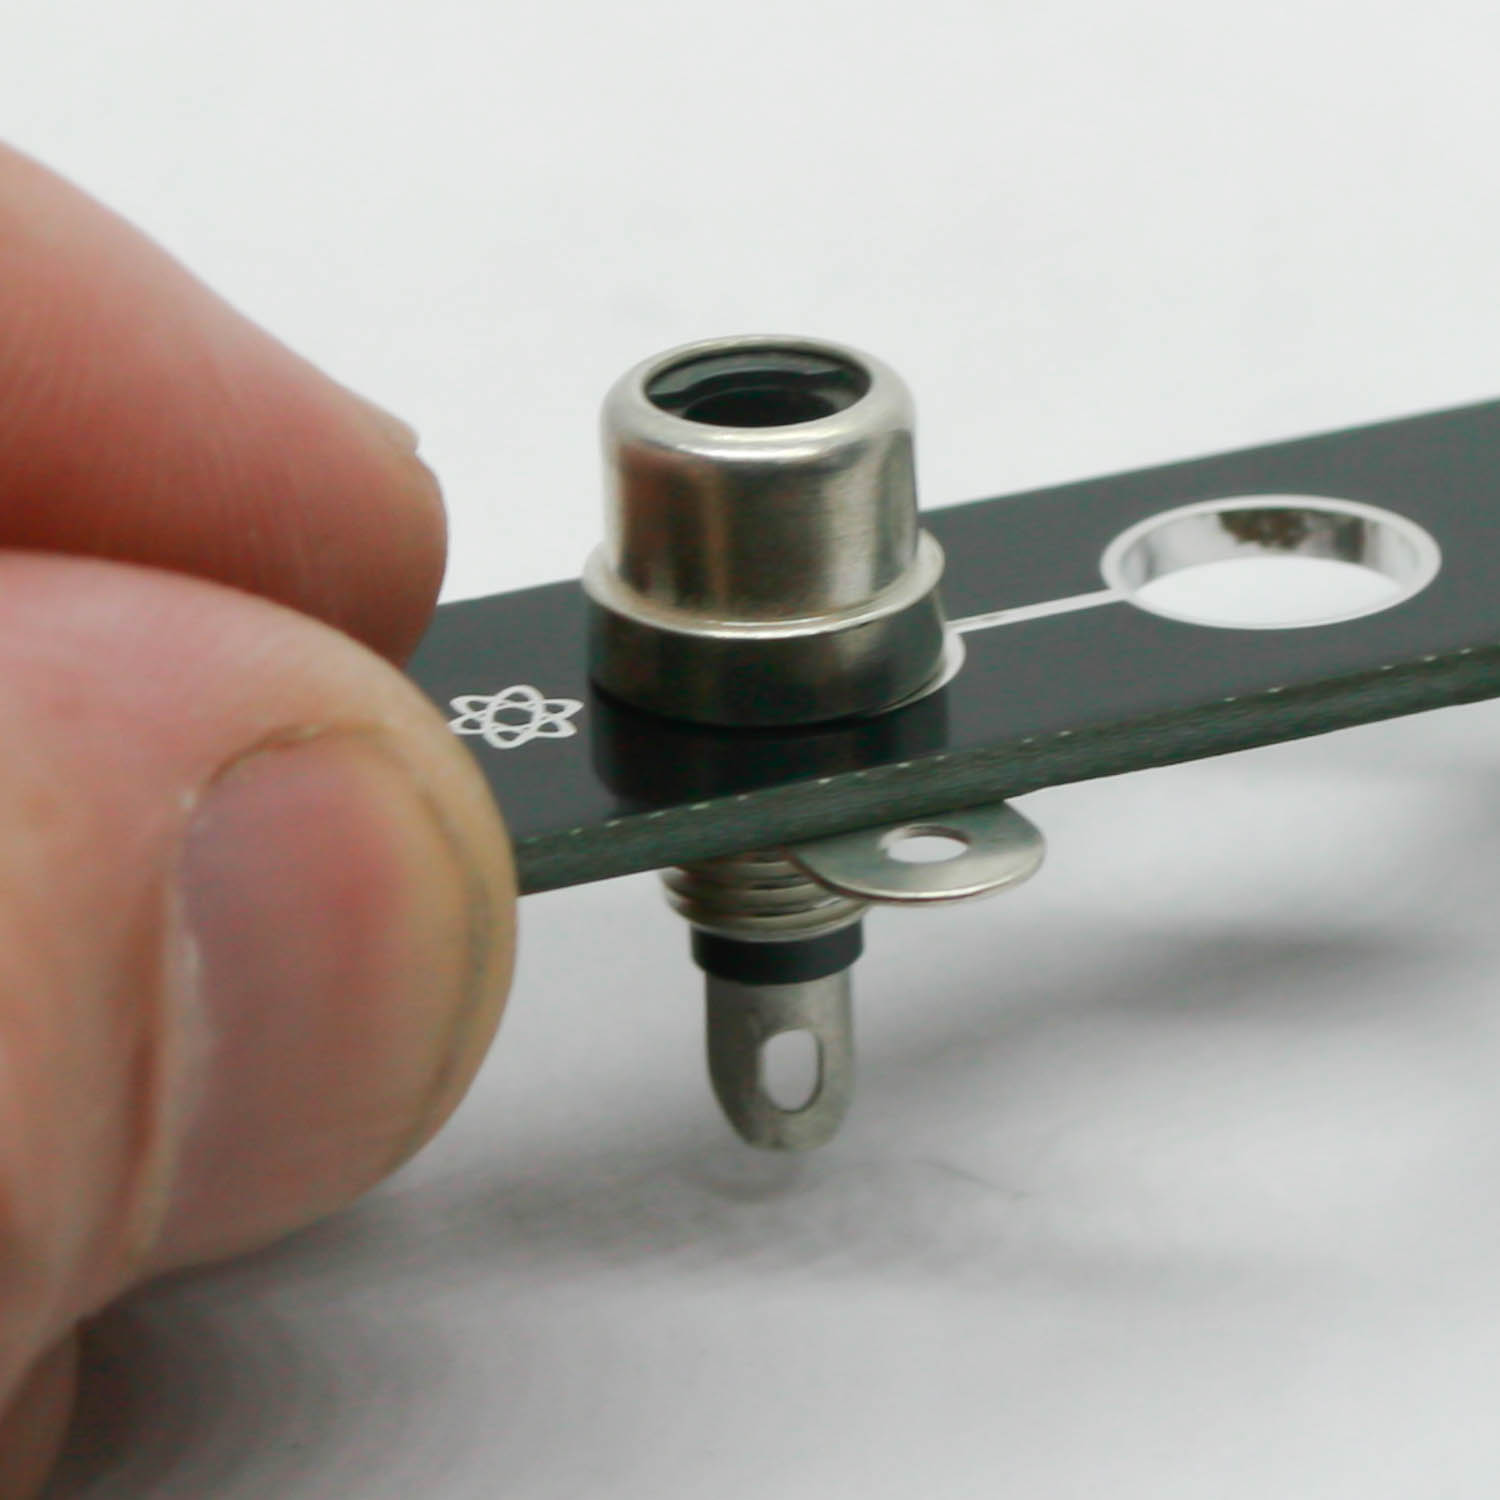
ADAPT RCA Panel 1
Carefully bend the ground lead over as shown below and make a candy-cane style hook from the provided lead clipping. It is best to wait to have all the jacks installed into the PCB BEFORE SOLDERING.
You can now turn the project over and solder in your RCA candy-cane ground hook. You can then solder the rest of your leads while making sure the PCB is squared up with the panel.
RCA PANEL PLACEMENT 2
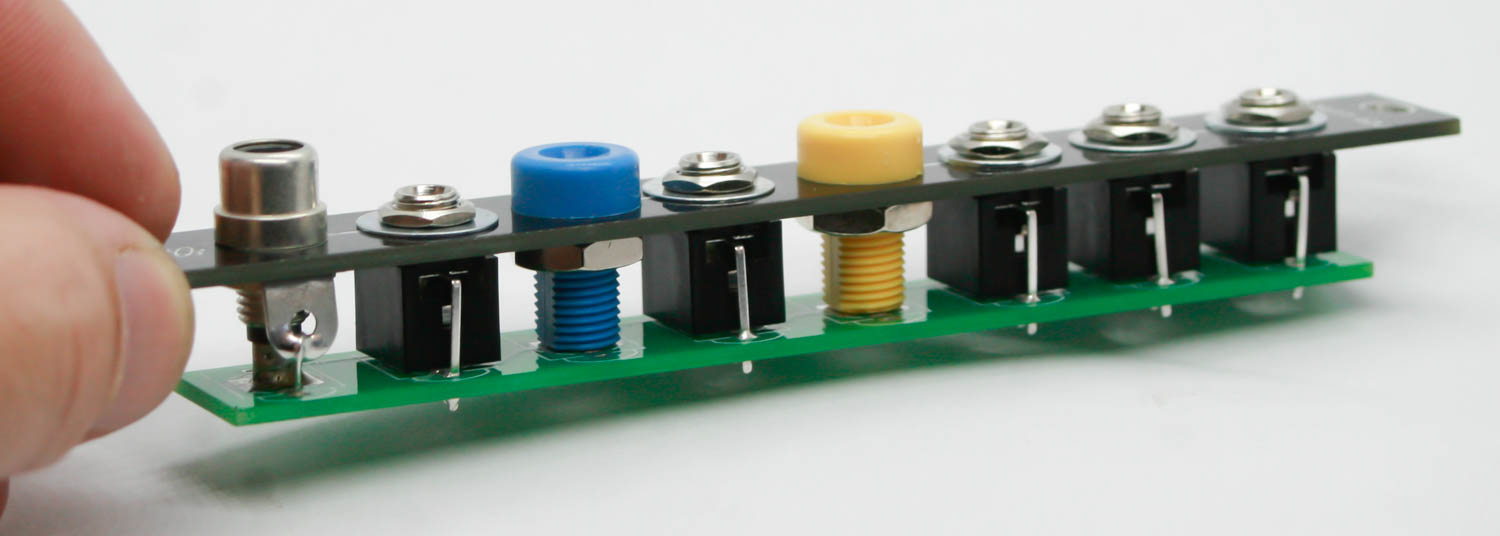
FINISHED PROJECT
Congrats on your build! The ADAPT series has different signal routing options. Plug in some signals and get to work or play!
ADAPT ADJ